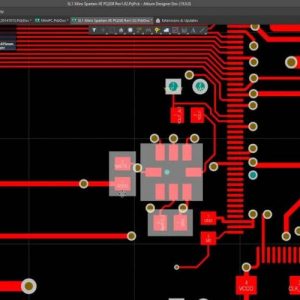
Altium software’s purpose is to design electronic products such as the printed circuit board (PCB). PCB designed by Altium is commonly used in telecommunications, automotive, defense, and aerospace. Most manufacturers require their clients to provide an Altium Gerber file before placing an order. Therefore, for those using Altium software, the process of exporting the file might seem quite hard, but it is straightforward. This article aims to update you on the step-by-step process of Altium Gerber export.
Step by step process of Altium Gerber export
Generate Gerber files
The first step of exporting Altium Gerber involves generating the Gerber files. For this process to take place, you need to go to the File tab. The File Tab is usually located at the left corner of the windows program. Once you spot the File tab, choose Fabrication Outputs and then select Gerber Files from the dropdown menu.
General settings
After you have selected the Gerber files, a window will appear below. The Window will require you to set the number of digits and units after and before decimal points. Generally, the precision is usually set at 2.5 (0.01 mill resolution).
Setting of layers
The next step needs you to use the tabs present at the Window, then go to the layer’s tab. The critical point to note at this step is that you are required to choose the layer that will be utilized for the Gerber files output. Also, you can choose the plot layers tab if you are not sure of which layer will be utilized. You can find the Plot Layers tab at the Window’s bottom left, then click ALL ON. Once you click on “ALL On,” layers will be selected for output in the project.
Setting of Apertures
At this step, you are required to go to the Apertures tab. Once you get there, make sure that the box for “Embed Apertures (RS-274-X)” is ticked. You can then decide to leave the Window in default settings.
Advanced setting
Go to the advanced tab at the top of the Window. At this step, you can opt to leave the Window’s setting at default. The only exception of changing the setting from default is only if your design has some unique specifications. Once you are done, click OK, the Gerber files output process will commence. At this step, the Gerber files will be generated and transported automatically from the Altium cam viewer. Furthermore, one of the best benefits of Altium Gerber is that it will allow you to confirm that all layers have been exported properly and are in a positive condition.
Produce NC Drill data
Once the Gerber file is generated, you need to transport the NC Drill data. The purpose of exporting the NC Drill data is to show the placement of holes and show the required size during the PCBs fabrication process. Therefore, go to file, then Fabrication outputs. From the Fabrication outputs, proceed to NC Drill files. The Window will need you to set the specific number of digits and units after or before decimal points.
Conclusion
The process of exporting Altium Gerber may seem daunting at first. But once all the steps are studied carefully and followed to the letter, it is quite easy. Therefore, if you wish to learn how to export the Altium Gerber, the above steps will guide you.